400W low power can have the following uses in indoor planting: led grow lights waterproof ,horticulture grow lights,led grow in lights Shenzhen Pvison Technology Co., Ltd. , https://www.pvisunggrowlight.com
1. Fill light: Indoor planting usually requires additional light sources to supplement the lack of natural light. 400W low-power lamps can provide enough light to help plants photosynthesize and promote their growth and development.
2. Control the growth cycle: indoor planting can control the growth cycle of plants by controlling the time and intensity of light. 400W low-power lamps can adjust the light time and intensity according to needs, helping plants get proper light at different growth stages, thus promoting their growth and flowering.
3. Provide enough light area: 400W low-power lamps are suitable for small and medium-sized planting Spaces, and can provide enough light area to cover plants, ensuring that each plant can get enough light.
4. Energy saving and environmental protection: Compared with high-power lamps, 400W low-power lamps can be more energy-saving and reduce energy consumption. At the same time, it also reduces the load on the environment, and is a good choice for the pursuit of green indoor planting.
It should be noted that 400W low-power lamps are suitable for small and medium-sized indoor planting, if the planting space is larger or the plant has higher lighting requirements, more powerful lamps may be needed to meet the needs.
How to Repair & Replace Door Hinges – A Comprehensive Guide
At Leader Doors, we recognize that even the tiniest details play a crucial role in home improvement projects, and replacing door hinges is a simple yet impactful task that can greatly enhance both the functionality and aesthetics of your doors.
Our detailed guide will walk you through the entire process of replacing door hinges, ensuring that your doors operate smoothly and securely. Whether you're a seasoned DIY enthusiast or a beginner taking on home improvements for the first time, our straightforward instructions will help you achieve professional-quality results with minimal effort.
**Table of Contents:**
- Why Do Hinge Pins Come Loose?
- How to Inspect and Tighten Loose Door Hinges
- Fixing Stripped Screw Holes
- Replacing Door Hinges Step-by-Step
## Why Do Hinge Pins Come Loose?
There are several reasons why hinge pins might become loose over time. Regular use can lead to wear and tear, causing the pins to loosen. Poor installation or misaligned doors can also result in pins working themselves loose. Environmental factors like humidity and temperature fluctuations can cause the door and its components to expand and contract, contributing to pin movement. Additionally, low-quality hinges may lack the necessary friction to remain securely in place, making them more prone to falling out.
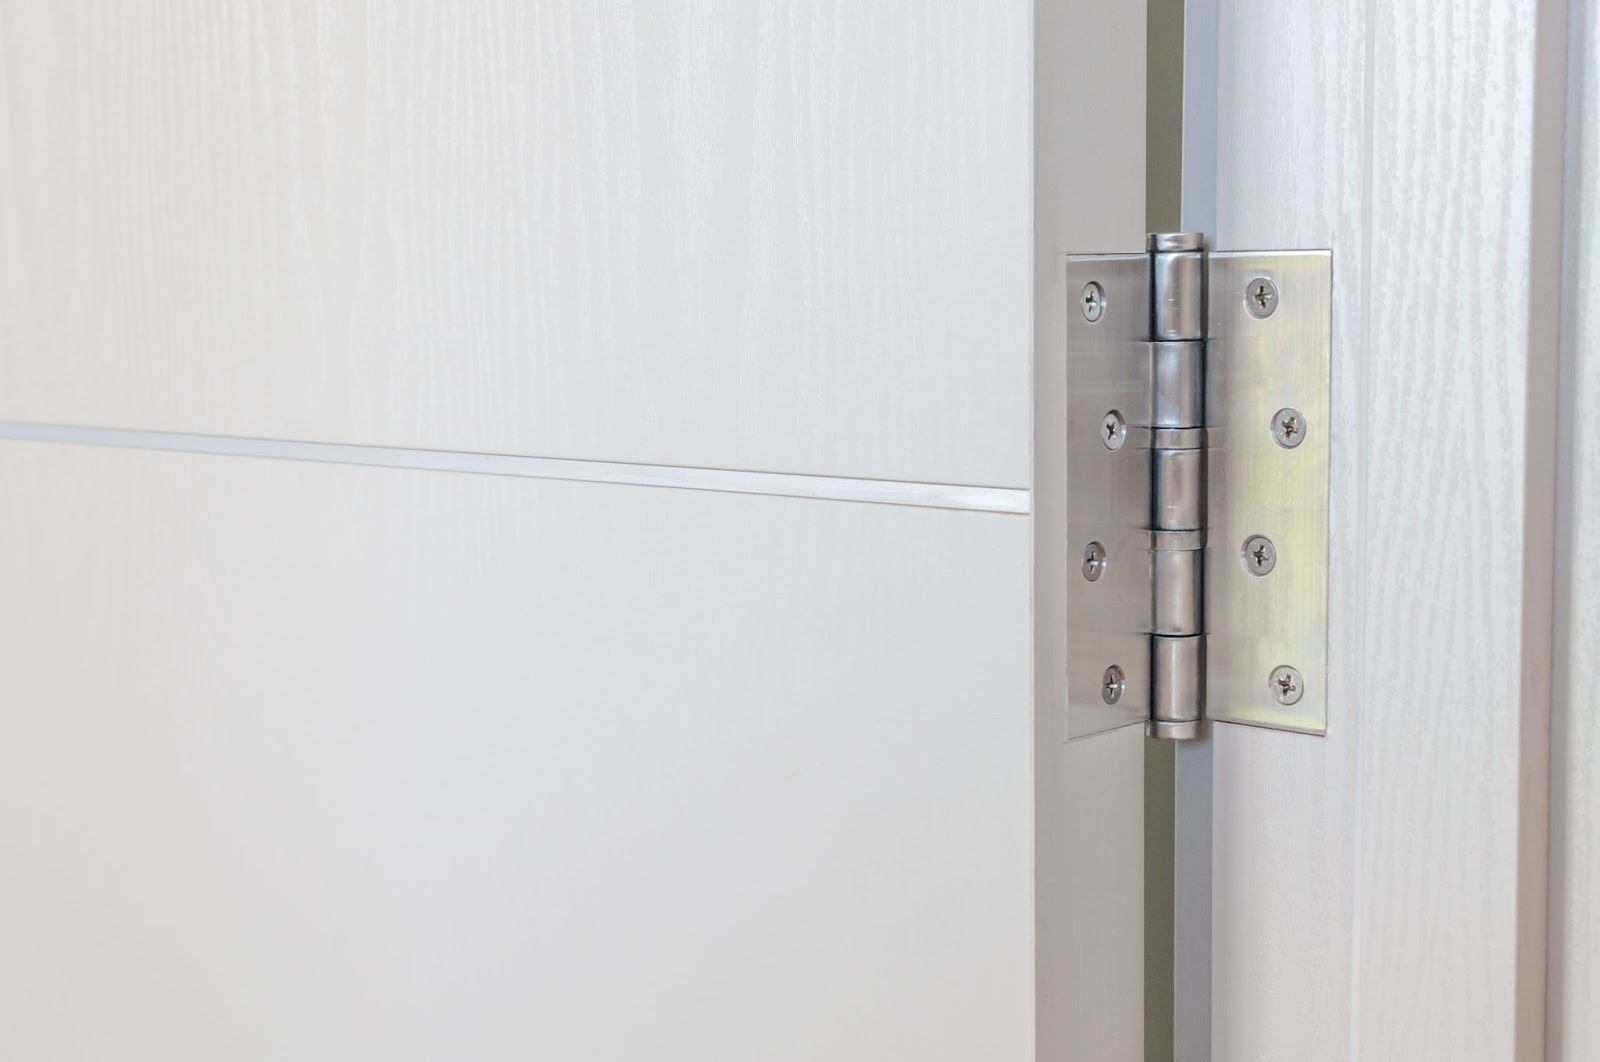
## How to Inspect and Tighten Loose Door Hinges
Before diving into replacing all the hinges in your home, it's essential to first check if your hinges are indeed loose. This step will help you determine whether the problem lies with the hinges or the door's hardware.
To check for loose hinges, open and close the door slowly, listening for any unusual creaking noises or noticing any unusual movements. Next, grasp the door by the knob or handle and gently lift it upwards. If you observe any movement around the hinge screws, it's time to tighten them.
Examine the hinges closely for gaps between the hinge leaves and the door frame. You can also use a screwdriver to gently tighten the hinge screws. If they turn without resistance, the hinges aren't securely fastened and will likely require tightening or replacement with new screws that provide better friction.
## Fixing Stripped Screw Holes
If you find that your hinge screws are loose and won't tighten properly, it could be due to stripped screw holes that can no longer effectively hold the weight of the door. Fortunately, there's an easy and cost-effective way to fix this issue before considering replacing your hinges entirely.
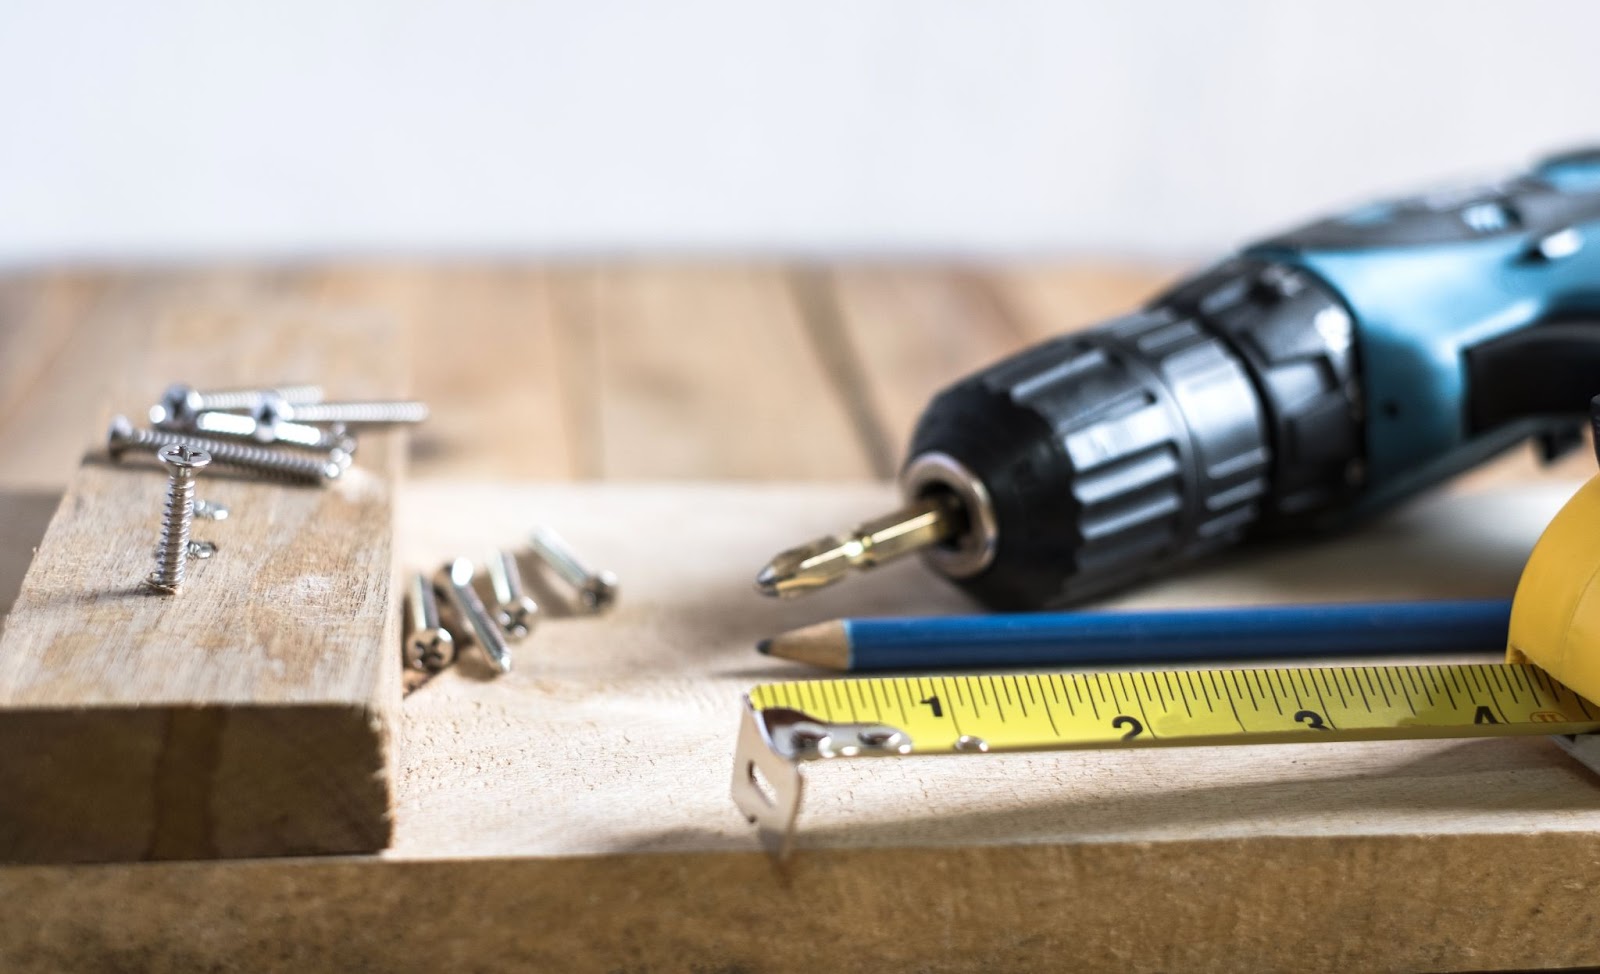
### What You'll Need:
- Blocks of wood or a sturdy doorstop
- Screwdriver
- Power drill
- Drill bit
- Matchsticks or wooden dowels
- Wood or carpenter glue
- Hammer
### Steps:
1. **Secure the Door with a Doorstop**
Before beginning any work on the door, it's wise to keep it propped open and secure to prevent it from moving around during repairs. A sturdy doorstop works well, but if unavailable, wood blocks can serve as an alternative.
2. **Remove the Old Screws from the Door Hinge**
Unscrew the old screws from the door frame using a screwdriver and discard them. If the screws securing the hinge to the door are still in good condition, you can leave the hinge attached. Otherwise, remove and dispose of these screws as well.
3. **Size the Dowel or Matchstick**
Before drilling, ensure that the dowel matches the diameter of the holes you plan to fill. Measure the depth of each hole and cut the dowel accordingly. Insert the dowel into the first hole and mark its length with a pencil. Trim it to about 1 inch in length. Repeat this process for all the holes you need to fill.
4. **Drill Out the Holes and Place the Dowels**
Use the power drill to clean out the existing holes. Apply a small amount of wood glue to the base of the dowel or matchstick and insert it into the hole. Gently tap it in with a hammer, then trim any excess and sand it down so it aligns flush with the frame.
5. **Pre-Drill the Holes and Install New Screws**
Once the glue has dried, pre-drill pilot holes in the center of the dowels before installing the new screws. Mark the positions through the hinge openings. After drilling, align the hinge with the holes and start the new screws. Avoid overtightening to prevent stripping the holes again. Just use a screwdriver to get the screws tight enough to hold the hinge securely.
## Replacing Door Hinges
If you've determined that the hinges themselves are the issue, or if you're simply updating your door hardware to match other elements, replacing them might be the best option.
Replacing hinges is slightly more complex than tightening screws or fixing stripped holes, but with the right tools and techniques, it can be a manageable task.
### Choosing the Right Type of Hinges
Before purchasing new hinges, carefully consider which type suits your door. There are various options available, and the choice depends on the specific door you're working on.
- **Flush Hinges**: These are highly versatile and ideal for flat surfaces like cabinets or interior doors.
- **Tee Hinges**: Often used on external doors like wooden doors or garden gates due to their durability and strength.
- **Parliament Hinges**: Suitable for doors that need to open fully, up to 180 degrees, such as emergency or fire doors.
- **Double Action Hinges**: Also known as spring hinges, these allow doors to open in both directions and return to the center automatically.
### What You'll Need:
- New hinges
- Blocks of wood or sturdy doorstop
- Power drill
- Screwdriver
- Tape measure
- Pencil
### Step 1: Secure the Door
As with any door work, the first step is to stabilize the door. Prop it open to access the hinge. The doorstop will ensure everything stays secure while you work.
### Step 2: Verify Measurements
Ensure your new hinges match the old ones in size and shape. Check the placement—typically, one hinge should be 7 inches from the top, and another 11 inches from the bottom. Use a tape measure and pencil to mark these spots.
### Step 3: Remove Old Hinges and Prepare Jamb
Start with the upper hinge. Remove the screws while keeping the hinge in place. Pull the hinge leaves away and inspect the underlying wood. Fill any unnecessary holes and repair stripped ones before installing new hinges.
### Step 4: Install New Hinges
Place the new hinge in the desired position and secure it with a screwdriver or drill. Repeat for the remaining hinges.
### Step 5: Test the New Hinges
Remove the doorstop and test the door's movement to confirm smooth operation.
**Shop Top-Quality Hinges at Leader Doors**
At Leader Doors, we provide a premium selection of hinges and accessories designed to meet high-quality and durable standards. Our collection includes various styles and finishes, ensuring a perfect match for any door in your home.
Each hinge is crafted with robust materials, offering reliable performance and smooth operation for years. Whether replacing old hinges or installing new doors, our hinges guarantee a seamless and secure fit.
**More from Leader Doors:**
- How to Hang a Door
- How to Make Your Front Door More Secure
- How to Change Your Door Lock
We hope this guide helps you tackle your door hinge project with confidence!